Guest Hairstyle: Angela with the Romantic Twist Updo

Happy Wednesday!

You guys... you HAVE to watch this video.
One of my lovely readers, Angela, made a video 
about one of her beautiful, wonderful hairstyles.
I can't wait to try it!

Enjoy!

bloglovin

Guest Hairstyle: Kiera with a Half-Up Topsy Tail

Not all of my hairstyles are easy to replicate.
Sometimes I can't even figure out how to do them again.

One of my buddies, Kiera, decided to give the 
Braided Side Topsy Tail a shot... and it didn't work out.
But she did end up pulling off an incredibly awesome
half-up topsy tail.


I love it!!!

************************

Want to try out a hairstyle and be featured on Bye Bye Beehive? 
Take your pick from my hairstyles
and send me an email with your photos and a little write-up!


bloglovin

Curl Your Hair Without Heat


Last week, I saw a post on my friend Kristen's blog
(Confessions of a Graphic Design Student).
She mentioned how she vintage-style curled her hair with a headband...
with NO heat.
Needless to say, I had to try it.

I began by putting an elastic headband over my slightly damp hair.
I grabbed pieces of my hair and tucked them around the headband,
continuing until I reached the back of my head.
It's really similar to the Holiday Updo that I did in December.
When I reached the back, I simply twisted that hair around and around 
the headband until it was all tucked in.
I slept in my headband overnight...


Daniel said I looked like Friar Tuck.
So this is the "Friar Tuck Method" now and forever in my eyes.
In the morning, I pulled the headband out of my hair and was 
SHOCKED at the curls I got.
Wowza, baby!


They stayed like that almost all day.
Of course they fell out a bit... but I didn't mind.

UPDATE // And just in case you'd like to see how to do this,
I included my very own video tutorial (original inspiration tutorial can be found here).
Enjoy!


Products used in this video:

Oh... and just last night after my shower,
I mentioned to Daniel that I was going to "Friar Tuck" my hair again.
His reaction was so adorable, and clearly showed that he found
that sleep-in style NOT attractive.
I opted for two French braids instead.
Sexy.

UPDATE** For those of you who asked 
if this could someday become a hot new trend... 
yes, the Friar Tuck... 
I've actually worn a version of it out before. 
Check out THIS LINK!

UPDATE PART 2** For those of you who say you
get a red mark on your forehead that won't go away for hours,
after you finish rolling your hair,
push the front of the band up, so it rests in your hairline instead
of on your forehead.
That's what I do!

bloglovin

Guest Hairstyle: Kasey with the Braided Bun

Last week I received a super-cute email from a 
darling named Kasey from Lessons from Ivy.
She took the liberty of sharing her hair story (and a hairstyle!) with me...
and now I want to share it with you!!
Take it away Kasey...

******************

2011 was the year of "Hair-Raising Disaster!"  You see, my sister decided to, of all things, get married last spring.  Right when I would be 4 months pregnant.  For those of you who have never experienced being 4 months pregnant after having 2 children within 2 1/2 years, let's just say being 4 months pregnant makes you feel a little frumpy.

I figured since I knew I'd feel frumpy, then I should do something fabulous with my hair, like get it straightened.  But instead of paying the pros to do it, I decided to take matters into my own hands and try a 7 day straitening kit.  I had read good reviews on this particular product and figured, what harm could there be?  BIG MISTAKE!!!

I followed the directions to a tee.  I should have listened to my gut, the smell of the product was noxious.  Anything that smelled that horrible couldn't be good for hair, but I pressed on through the process.

After I finished my hair was straight, and it stayed straight but........ then I started noticing my hair was literally breaking apart, and falling out.  It was awful.  I had little half inch pieces of hair sticking up all over my head.  In defense of this particular product, the company did refund my money, small consolation to the girl with hair falling out and wedding pictures in the near future.

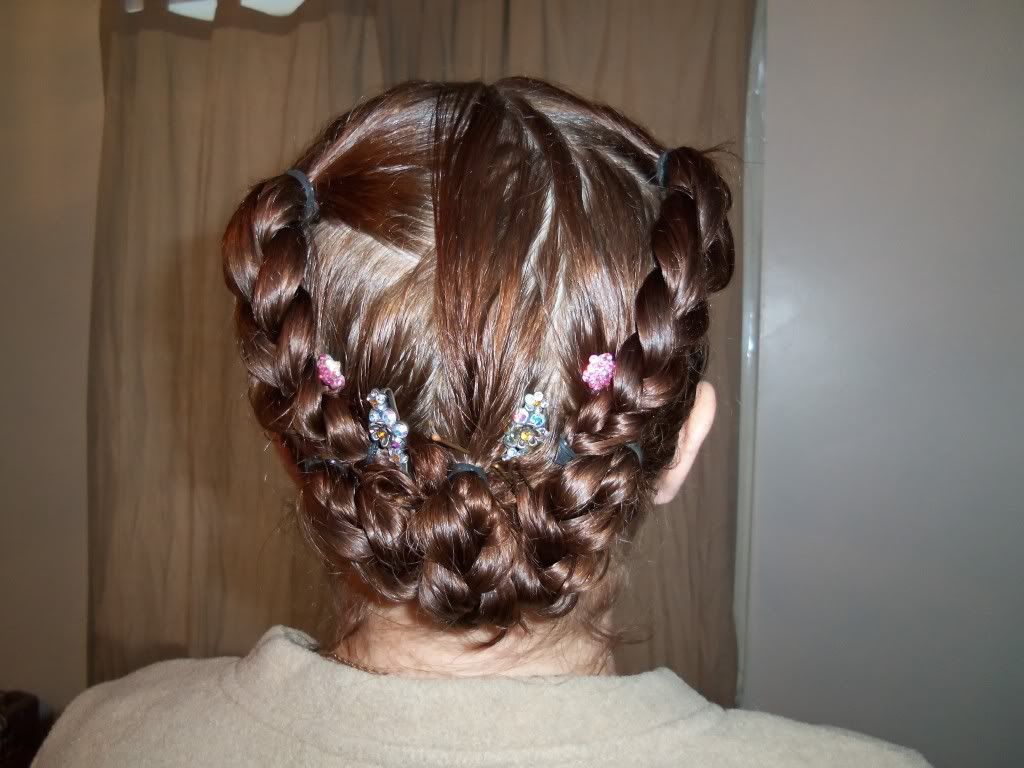
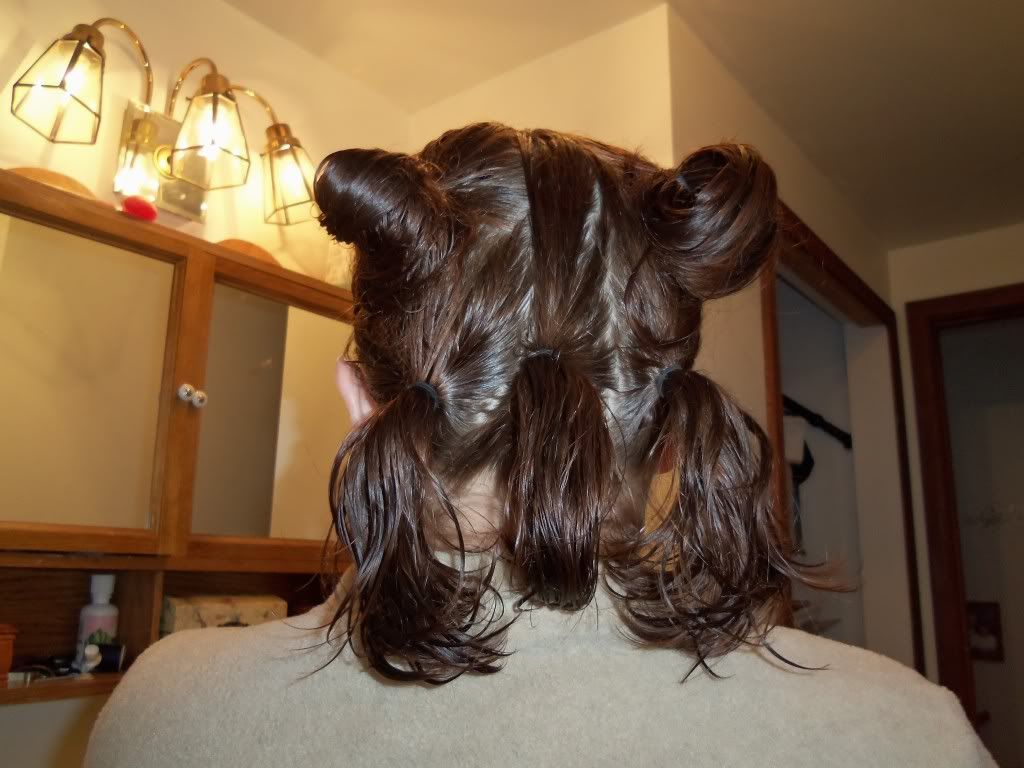
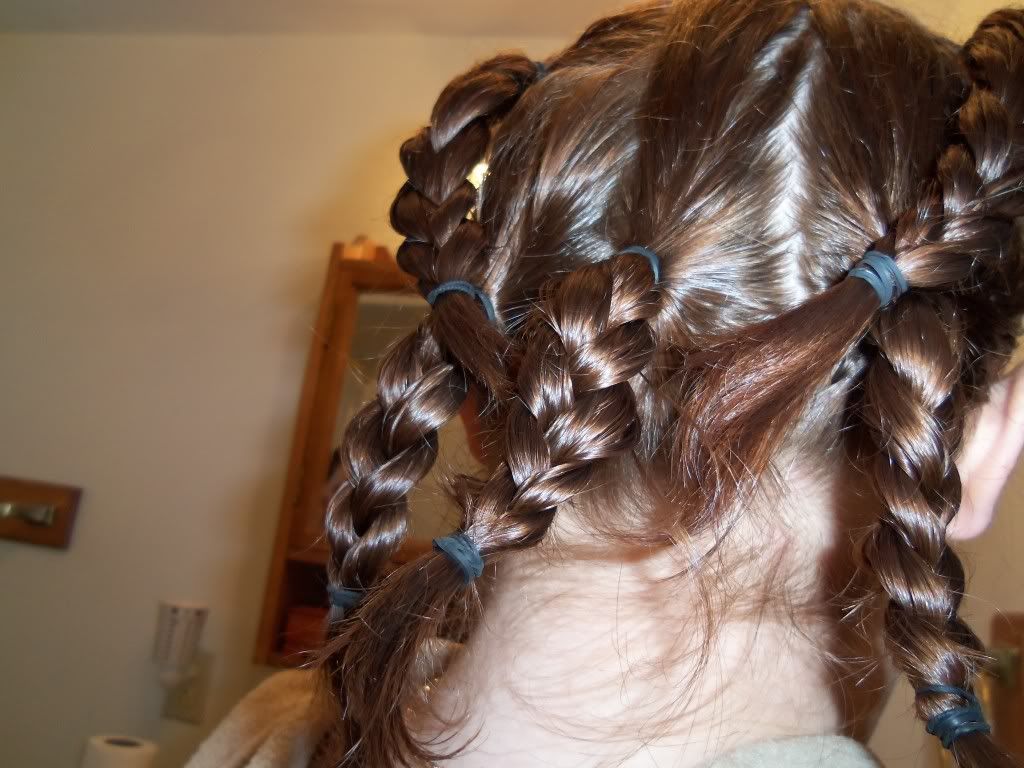
Fast forward to now, I've asked my hair's forgiveness and promised to be nicer to it.  I've gotten several cuts, and things are going back to normal.  But my length has not returned yet (oh how I miss a simple french braid), which is why I'm glad I found this style, the braided bun.  By using 8 tiny rubber bands I was able to make it work with my medium length hair, and has been the first up-do I've been able to have in a long time, *smile*. 


I just sectioned the top layer of hair into 2 sections, and my bottom layer into 3.  The rubber-bands helped hold everything together because my hair's shorter.  All in all it only takes about ten minutes to do when my hair is wet, another bonus.


I'm looking forward to being able to try some more fabulous up-dos as my hair grows, but in the mean time, I'm just happy it's not falling out!

You can find me at http://www.lessonsfromivy.com where I blog about being a wife and mom to three fabulous kiddos, and I hope I won't need to share any more hair disaster stories.

************************

Want to try out a hairstyle and be featured on Bye Bye Beehive? 
Take your pick from my hairstyles
and send me an email with your photos and a little write-up!

bloglovin

Guest Hairstyle: Cat with the Beach Twist

Taking a cue from my
one of my lovely Aussie blogging friends,
Cat from The Khromazone,
has decided to show us her version of the Beach Twist.


Clearly, her hair is amazing.
She is amazing.
Cat... do more hairstyles and show them to us!!


************************

Want to try out a hairstyle and be featured on Bye Bye Beehive? 
Take your pick from my hairstyles
and send me an email with your photos and a little write-up!

bloglovin

How to Poof a Ponytail Without Teasing or Hairspray


I recently had an email asking how to make big hair
without all the teasing and hairspray.
Now, I haven't figured out a way to do this with my hair down, 
but with it up? It's a cinch! 


  1. Begin with wavy or curly hair (dirty hair with a bit of texture works best!) Put your hair into a high ponytail.
  2. Add an alligator clip horizontally that goes through your hair under your ponytail and also partly through your pony. It should make the hair bounce up immediately.
  3. Make sure your hair in your ponytail is spread out throughout the top of the alligator clip
  4. Mess up your ponytail for added oomph.
  5. Voila— a big, messy ponytail.

If you really want you can add some hairspray, but I didn't find it necessary. 
Sure, it fell a bit throughout the evening, 
but that's OK because dudes don't tend to prefer it that big anyway.
Trust me, if you're doing big hair, guys probably are not a fan.
Keep it simple! ♥

bloglovin

Boho Side Braid


Last Friday I was struggling for inspiration for my hair.
So I just started braiding.
And BOOM-SHAKA-LAKA, the Boho Side Braid was born.

I zig-zag parted my hair down the middle and braided 
each plait in a cornrow French braid.
For my opposite side, I just made sure to bend the braid a little at the bottom
to make it angle toward my left side. 
When I finished, I wrapped a clear elastic around my hair to make a side ponytail.
I tugged on the outside pieces of my braid to make it poof out a little.

Side note-- my hair is getting SO DARK. It's amazing. 
In fact, it's kind of scary!!

bloglovin

FEBRUARY GIVEAWAY

hAPPY vALENTINE'S dAY lOvErS!

I thought we could celebrate with a GIVEAWAY!

Brought to you by my February sponsor, Diesel + Juice.
Enter to win:
one customizable 5x7 pet portrait.


Michele will take your photo and make an amazing digital print from it.
The print will also then be featured in her Etsy shop!

**********************************************

Mandatory Entry:
Follow Aunie Sauce blog via GFC

Additional Entries:
Like Diesel + Juice on Facebook HERE
Follow Diesel + Juice on Twitter HERE
Like Diesel + Juice on Pinterest HERE
Visit Diesel + Juice HERE and tell me your favorite item

Follow me on Bloglovin' HERE
Follow me on Twitter HERE
Like me on Facebook HERE

Tweet this giveaway
Post a FB status about this giveaway
Write a blog post

LEAVE A SEPARATE COMMENT FOR EACH ENTRY
Giveaway  closes February 21st @ Midnight.
Good luck!!

[[ UPDATE ]] Giveaway closed... thanks for entering!

Winner: Messy


bloglovin

Month 4


Month 1.                                          Month 2.                                       Month 3.
Month 4.

I don't know about you guys...
but I'm seeing some good growth!
I like the way this is going...

bloglovin

The Sponsor BUZZ: February


This month I have had the opportunity to work with
Diesel + Juice.

Michelle, of D+J, is amazing. Go give her a "Wassup?!" from BBB, will you?


Want to advertise on BBB in March? Click here!


bloglovin

My Messy Bun As Of Late


I'm fairly certain I have emphasized that 
I LOVE HAIRSPRAY
before, haven't I?

It used to be my saving grace when it came to making anything stay put,
making hair huge and poofy,
and making sure my hair did what I wanted.

And... now that I don't have it... I've been improvising.
I create a messy bun,
and then pull and tug to make it really big and messy.
Once it's nice and big, I take pieces and bobby pin them where I want them.
I don't point the bobby pins toward my pony tail holder (because to many makes it hurt!)...
I simply take a loop of bun (that's usually droopy and gross), 
and slide the bobby pin right over the chuck of hair I want to stay put, securing it to my head.
I make sure and do it under the visible part of loop, so you can't see the bobby pins while looking at my hair.
I usually end up with 5 or 6 bobby pins throughout my bun holding hair in place
to make it look bigger.

If that's confusing, I can do a vlog...
but it may take some persuasion :)

bloglovin

The Real Zoë Twist by Zoë

You know those girls who were just born with
great hair?
My friend Zoë is one of them.
She has thick, wavy, amazing red hair.
Today, she is awesome enough to come and show us how the 
is really done.

Oh... she also blogs over at From A to Zoë,
so please go show her some BBB lovin'.

********************************************************

Hey everyone! I was extremely flattered when Miss BBB herself first posted my signature hairstyle and am very excited that she asked me to guest post about my version of the Zoë Twist. I am no hair expert and usually wear mine in one of a few styles - straight, ponytail, naturally curly, or twisted up. The Zoë Twist is something that I pulled together by accident a few years ago, but it's been my go to second day curly hair style ever since. Sometimes it looks very chic and coiffed, other times it looks pretty messy (as you'll see below!), but it always stays put for hours and is a nice alternative to a regular messy bun or ponytail. I hope you enjoy and give it a shot!

Split your hair down the middle
Twist your two handfuls toward your head three times
Twist the twists together
This is the tricky part - holding onto the twists with your
left hand, pull your hair tie around to form your bun
Tuck any loose hairs into your hair tie (if you're using a mirror,
you can tuck the hair so it covers the hair tie)


It goes a little something like this...(thanks for the GIF, Annelise!)

bloglovin

Reverse Halo Braid


Well good Monday morning!

One of my favorite hairstyles I have done thus far was inspired by my sister, Marnie. She invented this style she dubbed the "halo braid" and I quickly swooped it up. The style originally appeared on this halo braid post.

She did it with a regular plait. I did it this time instead with a reverse or cornrow plait. It was a bit different, but I think I liked it better! It really showed off my slowly fading blonde, and was nice and messy, which makes it fun!

Do you want the steps to this little style? I tried to do them last time... and failed. So I'll give it a better shot today:

  1. French braid your hair in two simple braids (or reverse or cornrow braids).
  2. Then, tuck your ends under, up and inside the opposite side's braid. 
    • This isn't too hard. Just stick your finger up and under one of the braids and make a hole. Then pull the opposite braid up into the hole and bring it as far up and under the plait as you can.
  3. Pin it to secure it in place. 
  4. If this doesn't make sense... let me know and I will consider (mayyyybe) doing a video tutorial.


Think you'll give this one a try?

bloglovin

I. Found. A. Gray. Hair.


Yep. Gray ... or white ... hairs. I'm not sure which they are yet.
My initial reaction?


My opinion now? 
Eh... no biggie.

Maybe I'll go prematurely white like my grandma and have awesome snow-colored hair.

I'm convinced that these little white hairs have been there before...
but since I was always highlighting my hair I never noticed them.
So, thank you Bye Bye Beehive for showing me my true hair color.


bloglovin

Refinery 29 Next Big Style Blogger


VOTE FOR AUNIE SAUCE!
 
You guys.
Please vote for me!

Help me out, will you?

or visit
Find me (I'll be somewhere in the middle on the Recent Submissions page)

and click the heart by my photo to vote.
Please!!

I know I have the slimmest chance of winning...
Because I'm not half as stylish as some of the other ladies on there,
but your support would mean the world to me.

Spread the word!

I wanted to enter this contest last year but was too chicken...
but ladies, this year the chick has come outta the coop!!!

VOTE!!!

If this were an election,
and as part of my campaign I promised to post more style photos...
would you elect me? Pleassseee?


bloglovin